Custom Modules - Part 4 - Dynamicweb Server Controls
In this article I’ll show you some of the server-side controls Dynamicweb offers to aid you in building custom modules. You typically use these controls in the module's Edit page, although some can also be used in custom pages that let users manage data. NOTE: this article does not discuss the new UI controls such as the Ribbon that have been introduced in Dynamicweb 7 yet. In later parts in this series, or in a separate series, I’ll discuss these controls in more detail.
Additionally, you'll see how to fix the module so it's able to remember its settings between page edits.
Understanding the Dynamicweb Web Controls
Dynamicweb ships with a number of controls that help you build the user interface for pages in the Admin area of Dynamicweb. The most important ones are described in the following sections.
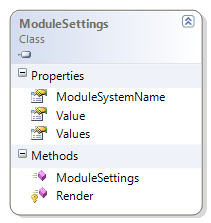
The ModuleSettings Control
The ModuleSettings control enables you to register the fields that you want Dynamicweb to automatically persist for you in the database with the paragraph.
 |
Relevant Properties |
|
Property |
Description |
|
Value |
Contains a comma separated list of fields you want to register for the paragraph and that are persisted in the database. |
|
| Values | Exposes the values you enter in the Value property as a List<string>. You usually don't need it but you can use it in the code behind of an Edit page to read or check the fields that are assigned. | |
ModuleSystemName |
Contains the module's system name so Dynamicweb knows for what module to register the fields. |
|
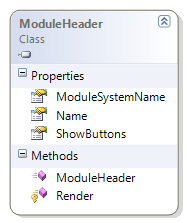
The ModuleHeader Control
The ModuleHeader enables you to define a header that appears at the top of the page in the module’s Edit page.
 |
Relevant Properties |
|
Property |
Description |
|
ModuleSystemName |
Contains the module’s system name. |
|
| Name | Enables you to assign a name for the module that is shown in the module's Edit page. You typically don't need to set this name, as Dynamicweb picks up the name you assign when registering the module automatically when this property is empty. |
|
ShowButtons |
When set to False, the Remove Module, Help and Theme buttons are hidden. |
|
The Editor Control
The Editor control renders a customized FCK Editor interface to enable a user to enter rich formatted text.
 |
Relevant Properties |
|
Property |
Description |
|
Text |
The text being displayed in the editor |
|
Toolbar |
The FCK Editor toolbar set. The toolbar definitions are defined in Editor\fckconfig.js for the shared /Admin application |
|
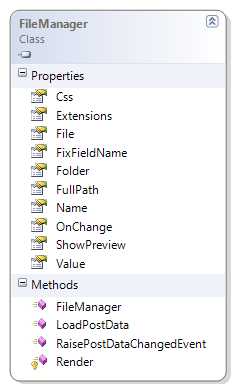
The FileManager Control
The FileManager control enables a user to select a file from a drop-down or a browse dialog. For example, to enable a user to browse for an image, use this code:
<dw:Filemanager id="SelectImage" name="SelectImage"
            Folder="" runat="server" />
To enable a user to select a template, you can use a fixed path for your (custom) templates folder like this:
<dw:Filemanager id="SelectTemplate" name="SelectTemplate"
            Folder="Templates/MyModule" runat="server" />
This locks the user in the Templates/MyModule folder and hides the browse and preview buttons. This makes it easy for a user to select a template that only applies to the current module and avoids the possibility that an unusable template is used.
The FileManager has the following relevant properties:
 |
Relevant Properties |
|
Property |
Description |
|
Extensions |
The extensions of the files to show in the drop-down list, separated by a comma. |
|
| File | The preselected file in the drop-down list. | |
| Folder | The folder from which to list the file. | |
| OnChange | Enables you to assign a client side function that is triggered when a new file is selected. | |
| ShowPreview | Determines whether to show a Show Preview button. True by default, but you can set it to False for file types that are now viewable in the browser. | |
Creating Extended Custom Modules
In the next section, I’ll show you how to modify the custom module so it is able to remember its settings on the Admin screen of the paragraph settings. In addition, you see how to enable a user to choose a custom template and how to use a DW Editor to enable a user to enter rich formatted text. In particular, you’ll see how to:
- maintain state in a module on a paragraph through code in Page_Load of the Module's Edit Page
- Use the Dynamicweb Editor control to let user enter HTML formatted content
- Use the Dynamicweb FileManager control to let users browse for a template.
- In Visual Studio, open up MyModule_Edit.aspx in Markup View and add a Text Editor in a new table row below the HelloText text field in the existing table with the following code:
<tr> <td>Long text</td> <td> <dw:Editor ID="Description" runat="server" /> </td> </tr> - Below the editor, add a Dynamicweb FileManager control to enable a user to select a template with the following code:
<tr>
  <td>Template file</td>
  <td>
    <dw:FileManager ID="SampleTemplate" Folder="Templates/MyModule"
          runat="server" />
  </td>
</tr>
Notice that since the Folder property starts with Templates/ModuleName, the user is locked in the Templates folder and has to select an HTML file from the drop-down list, rather than browsing for one.
- Register the two new fields in the ModuleSettings control in the page:
<dw:ModuleSettings ModuleSystemName="MyModule"
          Value="HelloText,Description,SampleTemplate" runat="server" />
- Switch to Code Behind and add a using statement for the Dynamicweb namespace above the class definition:
using Dynamicweb;
- Add the following code to the Page_Load event handler in the code behind of MyModule_Edit.aspx:
protected void Page_Load(object sender, EventArgs e) { Properties properties = Dynamicweb.Properties.LoadProperties(); properties.SetDefaultValue("SampleTemplate", "Template.html"); properties.SetDefaultValue("HelloText", "Default Hello Text"); properties.SetDefaultValue("Description", string.Empty); Description.Text = properties.Values["Description"].ToString(); HelloText.Value = properties.Values["HelloText"].ToString(); SampleTemplate.File = properties.Values["SampleTemplate"].ToString(); } - Modify the GetContent method in the MyModule class in the MyModule.cs file so it takes the template the user selected into account and sets the Description field:
//Get an instance of a template object Dynamicweb.Templatev2.Template template = new Dynamicweb.Templatev2.Template("MyModule/" + Properties.Values["SampleTemplate"].ToString()); //Set a tag named "Text" with the value from the HelloText property template.SetTag("Text",Properties.Values["HelloText"].ToString()); template.SetTag("Description",Properties.Values["Description"].ToString()); //Return the parsed template to the event handler return template.Output(); - Open up the template file from the /Files/Template/MyModule folder and add a Dynamicweb Template tag for the Description property like this:
<h1><!--@Text--></h1>
<div class="Description"><!--@Description--></div>
<p>If you see this, the module is set up correctly</p>
- Build the project, and resolve any errors you may have.
- Go to the /Admin section of your Dynamicweb site and log in.
- Add a new page. Next, add a paragraph with a new MyModule module, add some text to the simple Text field and the Text Editor, save the page and view it in your browser.
You should now see the Description text appear in the browser window. - Go back to the Edit screen for your module. Notice how your changes have been persisted.
Summary
In this article you saw how to extend two sides of the module: the CMS part that content managers see and the front end part that end users see. In the next article you see how to create the final part of the module: the part that lets you manage content in your your module in the /Admin section.
Downloads
With each article, I'll make a download available with the module I've built so far. Additionally, you can download the full running demo with all changes up to the latest part in the series. The first download always shows the code from the article you're reading, while the second download is the full example and may contain code that is added in later parts of the series.
